
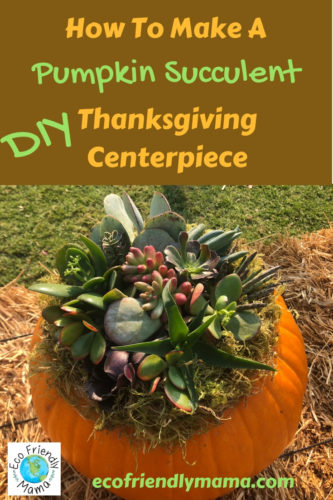
How To Make A Pumpkin Succulent DIY Thanksgiving Centerpiece
Wondering what to do with all your leftover pumpkins from Halloween? Looking for a thrifty way to upcycle your way to a DIY Thanksgiving Centerpiece? Here’s an easy, natural, and extremely affordable idea. I made this pumpkin succulent DIY Thanksgiving decoration at our preschool’s Fall Festival this past weekend, and it was so fun to do! So I wanted to pass along everything I learned in this super simple step-by-step DIY Thanksgiving centerpiece photo tutorial.
Step One: Pick Your Perfect Pumpkin
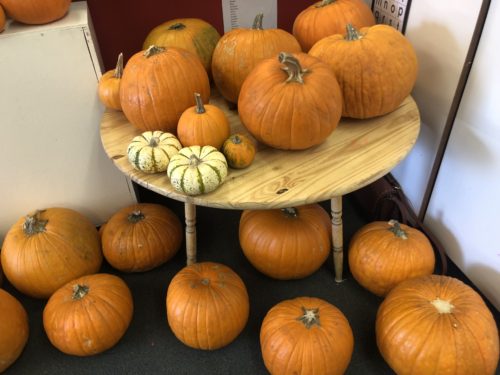
Chances are, you already picked out some beautiful-looking pumpkins for Halloween decor. For this pumpkin succulent DIY, you’ll want to use one that you haven’t carved. It will last longer, and your Thanksgiving guests probably don’t want a half-rotten jack-o-lantern staring back at them anyway.
If you carved all your pumpkins already, here’s a hot tip: many pumpkin patches will give you pumpkins for free the day after Halloween!
They will also sometimes give you bales of hay for free too if they have them. You have to call in advance to check, and have a car or truck to haul them away in. But many will be thankful to have less to cart away. Our preschool was able to snag probably 100 pumpkins and a dozen bales of hay for their post-Halloween fall festival this way!
Step Two: Get Succulent Clippings And Moss
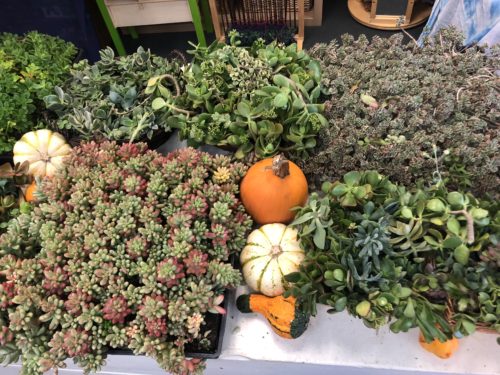
Because this event was a fundraiser organized by hard-working parent volunteers, they were able to get all the succulents you see in this pic (and more) donated for free. Many were simply clipped from plants in people’s backyards. Living in Southern California, a desert climate, this is relatively easy for us to do.
Having a nice variety of succulent shapes and colors will give your DIY pumpkin centerpiece more character and shape.
But if you don’t live somewhere where succulents grow plentifully, you can also buy them at plant and gardening stores including at Home Depot. If you’re in a pinch, some florists carry them too, though you’ll probably pay more there.
Ditto for the moss, pictured below. If you can’t find moss however, it’s not a critical component. More of a finishing touch.

So if you’re able to find a friend who is willing to let you clip some of their plants (and really, you’re kind of doing them a favor too by paring back their greenery), you’ve gotten the most important supplies for this pumpkin succulent DIY Thanksgiving Centerpiece for free!
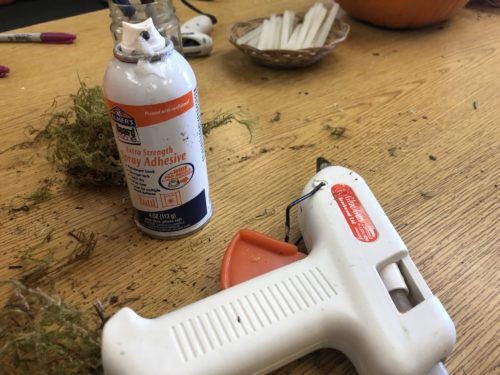
Step Three: Hot Glue Gun And Spray Adhesive
Let me just preface this by saying that I am not a crafting expert. I am just an average DIYer, with an average amount of supplies. Unlike a friend’s neighbor, who is a DIY goddess, I do not have an entire section of my garage devoted to all my crafting needs and accessories!
I do, however, happen to own a glue gun and spray adhesive already. These are pretty versatile tools that you’ll find come in handy for a variety of projects. While not exactly eco-friendly, I figure using them is overall more eco-friendly than buying mass-produced plastic decorations. (By the way, if you do know of better adhesive alternatives, please let me know in the comments below!)
If you don’t happen to have these two items, you can easily buy them at your local crafting store or even places like Target. Or, if you happen to know a DIY goddess, ask to borrow hers! You probably won’t need much glue (I didn’t even go through one stick) or spray adhesive.
Step Four: Snap Off The Pumpkin Stem
Because these pumpkins had been off the vine for a while, the stem was so dried that I was able to easily snap it off with my bare hands. In fact, I was actually in the midst of saying “I don’t think I’m strong enough to snap this off” when it came right out with a gentle pull!
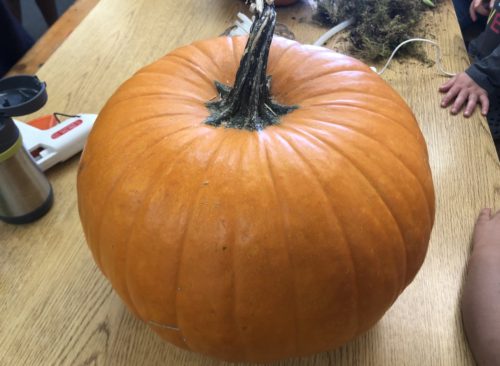
So, I recommend using a slightly older pumpkin with a drier stem. Chances are, if this is a pumpkin you purchased weeks earlier as a Halloween decoration, the stem will be dry enough to snap off. Otherwise you’ll have to cut it off with a knife, or work around it. (To be honest though, that is perfectly fine too).
Step Five: The Fun Part – Start Gluing!
You don’t have to be a flower-arranging expert or even that artistically-talented to do this pumpkin succulent DIY Thanksgiving centerpiece! I certainly am not. I just picked a variety of succulent shapes and colors to use.
Start at the center of the pumpkin and then work your way outwards. I recommend doing this in a spiral shape, so you can cover the stems with each progressive succulent cutting.
Lay the succulent piece on the pumpkin where you think it should go before you glue it!
That way, you’ll know exactly where to apply the hot glue and also don’t have to worry about the glue drying before you figure out where to place the piece.
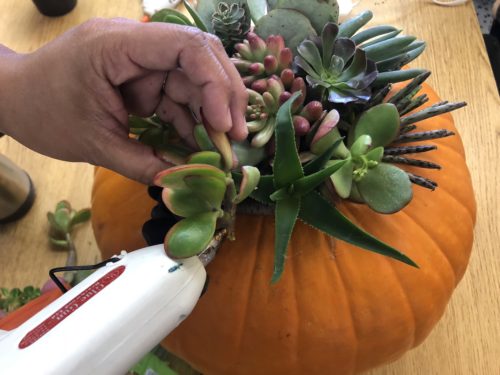
Not that it really matters, but this is not my hand. I just asked another mama at the fall festival to pretend to be me while I took the photo. And now I’m telling you because I am horrible at keeping secrets lol!
As you’re gluing on the succulent clippings, don’t be discouraged if it looks a little wonky and uneven! As it becomes fuller the natural beauty of the plants will even themselves out.
My one caveat is to try to vary your placement of the different succulent types so that you don’t have entire zones of the pumpkin filled with only one type, like an unwanted succulent pie chart.
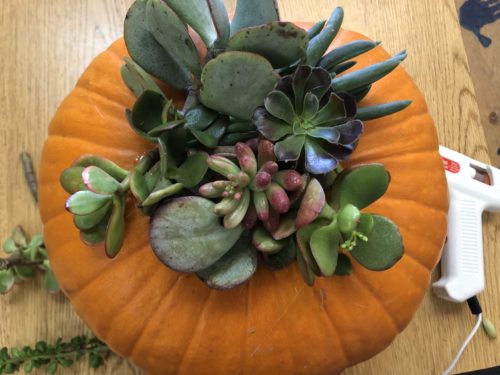
Not quite done yet. I wasn’t happy with how that piece on the left side was flopping out, but as I kept gluing more succulents around it, the overall composition evened out!
Keep going with the succulent application until you’ve still got a couple inches of pumpkin circumference left, especially if you’re planning to add moss to it. You want your pumpkin to have a neatly cropped hairstyle instead of a shaggy do hanging off the sides. Bart Simpson instead of a Beatle if you get my drift.
Step Six: Moss It Up!
Now, I want to preface this by saying that at first, I thought I had messed up. I realized after I started gluing succulents that other parents who were making pumpkin succulent centerpieces with me had started by gluing the moss on first, and then gluing the succulents on top of it.
But, as it turns out, putting the moss on last, as a final outer ring to even out the border, worked perfectly fine. And I’d actually recommend it if you have a limited quantity of glue or moss since you’ll use far less doing a final ring than an entire covering on the top (most of which no one will ever be able to tell is even there in the end).
This is where the spray adhesive comes in.
As with the succulent clippings, lay out your pieces of moss before gluing on, so you know how you want to place it!
Then, once you know where it’ll go, apply the spray adhesive and gently pat the moss into place.
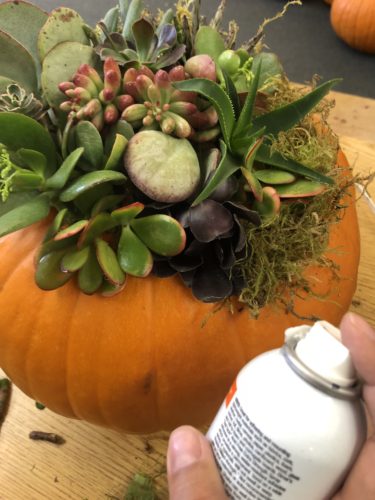
This photo is in fact of my own hand.
Continue to glue on the moss until it’s formed a complete ring around the succulents. You can use extra moss in places where the succulent edge isn’t perfectly even.
And if you don’t have moss, don’t worry! When I did this pumpkin succulent craft at the fall festival last year, I didn’t use moss and it still came out looking really cool.
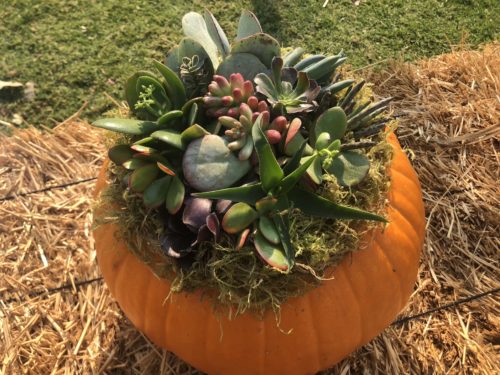
Tada!
And there you have it! A beautiful DIY pumpkin succulent you can use for a Thanksgiving centerpiece. It also makes a lovely eco-friendly Thanksgiving home decoration and gives your home a naturally festive feel!
They make great seasonal gifts too! It took me about 20 minutes to make this one, so you can easily make multiples and then hand them out to friends and neighbors as a holiday gift. We gave this one to my father-in-law as a get well present, instead of the usual flowers wrapped in plastic from the grocery store.
One final piece of advice:
Your DIY pumpkin succulent can last for weeks if properly cared for! Keep it out of direct sun/heat, and spritz occasionally with water. I’ve heard that with some low-key maintenance, they can last into the new year.
And if you still find yourself with leftover pumpkins to use up, check out Home & Harrow’s Pumpkin Pie Smoothie With Toasted Walnuts Recipe!
Happy DIYing and hope you have a sustainably-chic Thanksgiving!


Jackie
What a cute idea! Thanks for sharing 🧡
Eco Friendly Mama
Thank you Jackie!
Gemma
I love this idea! So festive, creative and different from other decorations.
Eco Friendly Mama
Thanks Gemma – wishing you a happy Thanksgiving!
Heather Nicole Gilbert
Oh my gosh this is great! Do you know how long they typically last?
Eco Friendly Mama
I mentioned this in the post, but if you keep it out of direct sunlight and heat, your pumpkin centerpiece can last well into the new year! Mine still looks great a week and a half later : )
karen
this is such a cute idea. so perfect for decorating around thanksgiving. I love succulents and natural centerpieces.
Eco Friendly Mama
Thanks Karen, I do too, which is why I really loved making this pumpkin project!
Amy @ Orison Orchards
These are super cute and they look so easy! I know each of my sisters would love one of these. I love the tip about finding leftover pumpkins and hay bales free, too!
Eco Friendly Mama
Yeah! You’re helping them out by reducing the waste they have to put in the trash bins, and you get the materials for free. It’s a win-win : )
Lara
I never would have even thought of this! What a cool idea!
Eco Friendly Mama
Right?? I can’t take credit for coming up with this idea myself, but it was so easy and fun I had to share : )
Bailey
Oh my goodness! This is SO adorable! I’m definitely going to make these for Thanksgiving centerpieces!
Eco Friendly Mama
It’s perfect as a centerpiece! Thanks Bailey and Happy Thanksgiving : )
Shanophia
How creative. This turned out nice!
Eco Friendly Mama
Thank you!
Valinda
What a great idea! Thanks for sharing. You get my creative juices flowing! I am going to use a white gourd for winter in stead of a pumpking.
Eco Friendly Mama
Using a white gourd is a fantastic way to make it more wintery! Thanks for reading and let me know how it goes : )